Maximum permitted laden mass.
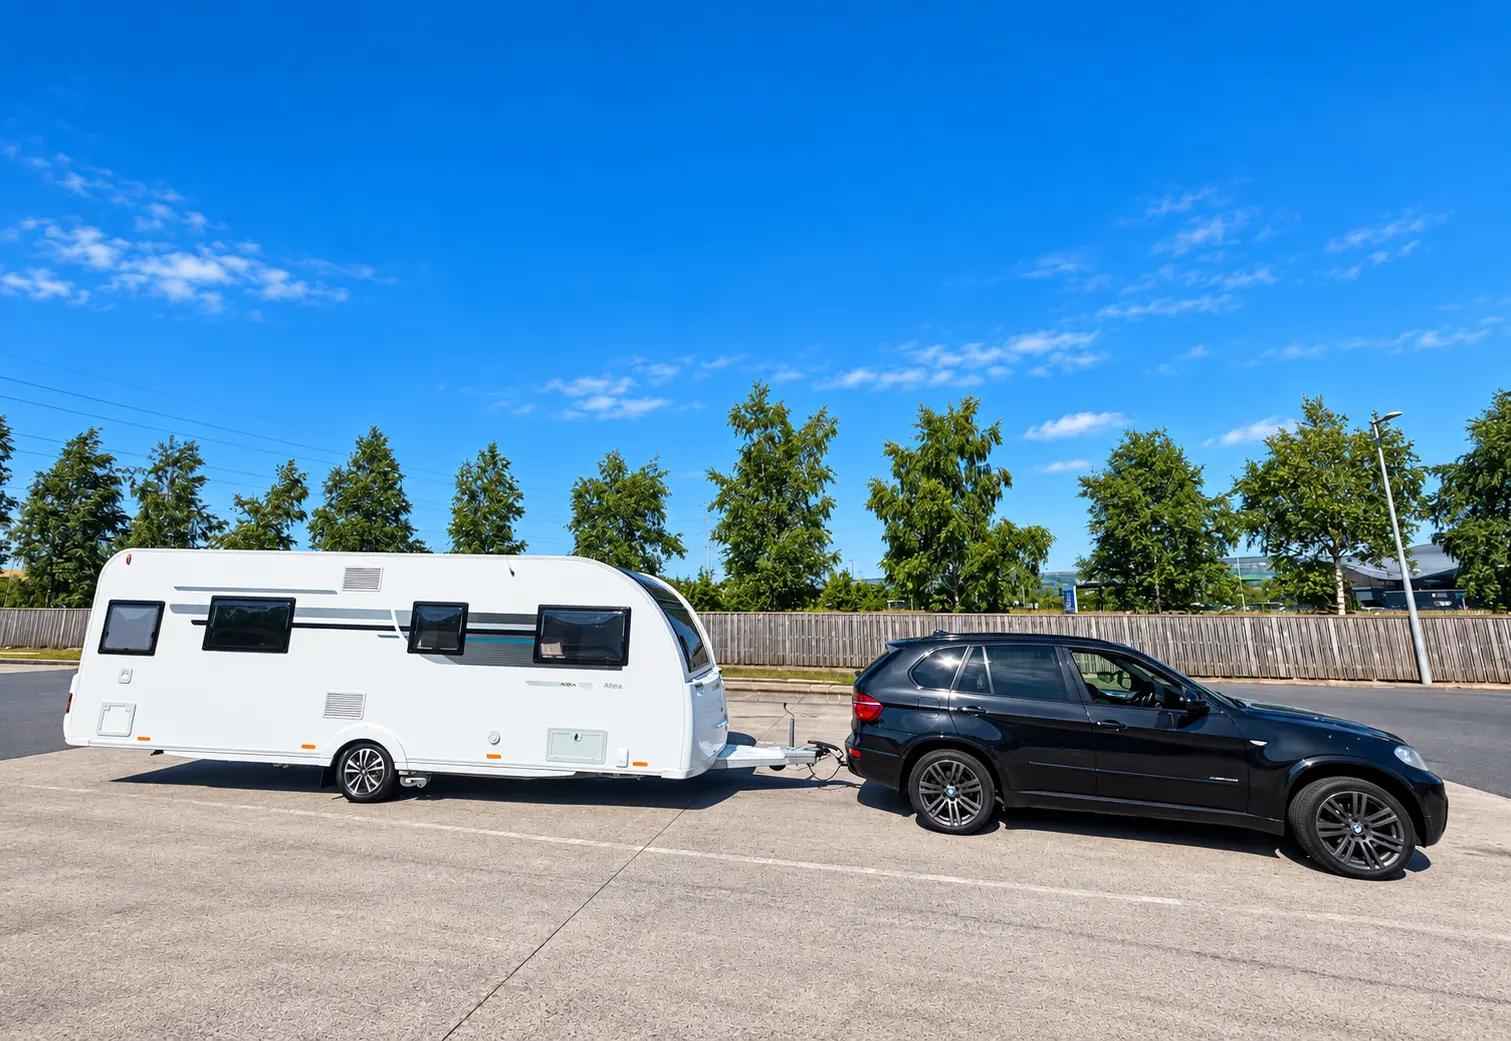
2020 · ADRIA ALTEA TYNE 612 DL
THE KEITH MOORE
CARAVAN BIBLE
Verified instructions for the moments that matter—written to tell you exactly what to do while you’re standing at the caravan.

KEITH’S CARAVANAltea Tyne 612 DLFront lounge · central kitchen · rear singles
How to read the evidence labels
Never treat a familiar-looking switch or valve as identified unless its label, location and outcome match.
Confirmed
Model-specific
General guidance
To confirm
Caravan identity
Numbers that govern loading and towing
Manufacturer’s stated mass in running order.
MTPLM minus MRO; weigh the loaded caravan.
Also obey the lower car or towbar limit.
Check the fitted sidewall before replacement.
About 65 psi, from the caravan plate.
Keith’s photographed wheels are alloy.
Gas and 230V heating with CP Plus control.
Privacy: the public handbook deliberately omits the VIN, ownership records and private service details. Those remain in Keith’s master document.
Use at the caravan
Quick procedures
Open the card you need. Each sequence includes the success sign and the reason to stop.
01Before towingFinal safety sequence at the hitch
Before you start
Load low and securely. Close rooflights, windows, internal doors and the fridge. Turn water pump and gas bottle off.
- Raise every corner steady fully. Stow step, water/waste containers, mains lead and loose exterior items.
- Confirm the mover rollers are fully disengaged and its dedicated isolator is off. The mover isolator is not the caravan’s 12V MASTER.
- Check tyre condition and cold pressure. Confirm wheel bolts have been checked to the correct schedule; use 120 Nm for Keith’s photographed alloy wheels.
- Couple to the towball. The coupling indicator must show engaged and the hitch must stay attached during a firm jockey-wheel lift test.
- Lower the stabiliser handle. Attach the breakaway cable to the approved towbar point so it will not drag or snag.
- Connect the 13-pin plug, raise and secure the jockey wheel, release the caravan handbrake, remove chocks, and test every road light.
- Walk around once more in one direction: locks, flaps, windows, rooflights, steadies, tyres, cable, plug, lights and number plate.
Success looks like
Hitch positively coupled, stabiliser down, cable and plug correctly routed, jockey wheel locked up, mover clear, all lights working.
Stop
Do not tow if the coupling indicator is wrong, the lift test fails, any tyre is damaged/soft, a road light fails, or the mover remains engaged.
02Arrival / set-upFrom pitch entry to systems ready
- Survey the pitch for branches, posts, slopes, soft ground and the reach of the hook-up cable.
- Position and level side-to-side first. Apply the handbrake and chock securely before unhitching.
- Use the mover only on firm ground: isolator on, engage rollers, manoeuvre slowly with a clear observer, stop, handbrake on, then disengage rollers and isolate.
- Unhitch, level front-to-back with the jockey wheel, then lower steadies onto firm pads. Steadies support; they do not jack or level the caravan.
- With the pitch supply off, connect the blue CEE lead caravan-first and bollard-last. Switch on and test the caravan RCD using its test button.
- Close the verified drain points, connect fresh water, turn MASTER then PUMP on, and prime through a cold tap followed by each hot tap.
- Open gas only if needed, select the correct fridge/heating source, and complete an inside/outside leak and ventilation check.
Success looks like
Caravan level and stable, mover disengaged, 230V protection tested, steady water flow with no leaks, and appliances on the intended source.
03Departure / pack-upReverse sequence without the expensive mistakes
- Cool and switch off heating/hot water. Turn PUMP off, close the gas cylinder valve and secure the fridge.
- Empty the waste and toilet cassette. Disconnect water; cap the inlet to keep dirt out. Stow hoses and containers dry where practical.
- Switch the pitch outlet off. Disconnect bollard-first, then caravan; coil and inspect the cable.
- Secure loose items, doors, drawers, shower fittings, rooflights and windows. Put the TV aerial down if fitted.
- Raise steadies completely before moving. Hitch and complete every item in “Before towing”.
- Carry out a final clockwise walk-around and check the pitch for forgotten equipment.
Classic damage risks
Moving with steadies down, mover engaged, hook-up lead connected, rooflight open, jockey wheel low, or locker/flap unsecured.
04Gas space heatingTruma Combi 4E · CP Plus
Gas bottle ON→12V MASTER ON→Room heat→GAS
- Confirm the flue is unobstructed and no gas smell is present. Open the cylinder valve slowly.
- Turn the caravan 12V MASTER on. At CP Plus, rotate the knob to the room-heating icon, press, choose a temperature above the current room temperature, and press to confirm.
- Select the energy-source icon, choose GAS, and confirm. Leave fan on ECO/AUTO for normal heating.
- Allow ignition and warm-up time. The fan may wait while the heat exchanger warms, then warm air should reach the outlets.
Success looks like
No warning code; the burner runs, fan starts and outlet air becomes warm.
Stop
Gas smell, repeated ignition failure, soot, abnormal flame/noise, blocked flue or CO alarm. Close the cylinder and ventilate safely.
05Electric / mixed heatingUse only on a live 230V hook-up
- Confirm a live hook-up, RCD/MCBs on, and adequate pitch amperage. Turn 12V MASTER on because CP Plus and the heating controls need 12V.
- Select room heating and the desired temperature on CP Plus.
- Select EL1 for lower electrical demand or EL2 for faster output if the pitch supply permits. MIX1/MIX2 combines gas and electric for faster warm-up.
- Leave fan at ECO/AUTO and monitor for tripping.
Winterised caravan
Truma permits space heating with the water container empty. Keep water heating OFF and the system drained; do not select a hot-water temperature.
Stop
If the hook-up trips, reduce simultaneous high-load appliances. Repeated tripping needs fault diagnosis—not a larger fuse.
06Hot waterFill and vent before heating
- Confirm FrostControl is closed: blue lever vertical and black reset button held in. Close any other verified water drains.
- Connect fresh water. Turn 12V MASTER and PUMP on.
- Open a hot tap. Leave it open while air spits out; close only when the flow is steady. Repeat at the remaining hot taps and shower.
- Inspect beneath seats, at the heater and outside for leaks. Only then select water heating on CP Plus: 40°C, 60°C or BOOST as needed.
Success looks like
Steady aeration-free hot-tap flow before heating, no discharge under the caravan, no leak and no CP Plus fault.
Never dry-heat water
If the boiler may be empty, cancel water heating. Space heating is a separate operating mode.
07Water fill / drainExternal container and Truma boiler
Fill
- Clean the container and fill with potable water.
- Insert the submersible pump into the container, connect to the Truma Ultraflow inlet, and keep the cable/connector clean.
- Close identified drains. MASTER on, PUMP on.
- Prime cold taps, then hot taps until flow is steady. Check for leaks.
Drain
- Water heating off; allow hot water to cool. PUMP off and disconnect fresh water.
- Open FrostControl: rotate blue lever horizontal. Water should discharge beneath the caravan.
- Open all taps midway between hot and cold; drain the shower hose/head and leave relevant drains open.
- Do not refit dust caps onto open drain outlets. Refit protective inlet caps after the hose is removed to exclude dirt/insects.

08ToiletThetford C262CWE cassette
- Confirm the blade is closed before removing the cassette. Prepare the cassette with the correct product and dose on its label.
- For use, press the flush briefly, open the blade with the handle, then close the blade after use and flush as required.
- To empty: close the blade, switch the flush off if needed, remove the cassette externally, rotate the spout, remove the cap, press the vent button and pour at an approved disposal point.
- Rinse with clean water; avoid domestic bleach and abrasive cleaners. Lubricate the seal only with a Thetford-approved seal lubricant.
- For winter storage, empty, clean and dry the cassette and flush system; leave the blade closed and the cassette loosely ventilated as its manual directs.
09Electrical faultSafe checks in the right order
- Decide what has failed: all 230V, one 230V circuit, all 12V, or one 12V appliance.
- No 230V: pitch outlet on → lead seated at both ends → caravan RCD/MCBs on → site bollard breaker/reset → try without high-load appliances.
- No 12V: MASTER on → battery voltage/terminals → charger status when on hook-up → main and relevant blade fuse.
- One appliance: its own controls, isolation switch, connector and correctly rated fuse. Replace only like-for-like after the cause is understood.
Stop
Repeated RCD/MCB trips, burning smell, heat, arcing, wet electrics, damaged hook-up lead or a fuse that blows again. Isolate and use a competent caravan electrician.
10WinterisationKeith’s September 2026 method
No automotive antifreeze
Never put engine/automotive antifreeze into the potable-water system. Drain thoroughly; use only products explicitly approved for potable systems if the equipment maker requires one.
- Switch water heating off and let it cool. PUMP off; disconnect and drain the external pump/hose.
- Open FrostControl: blue lever horizontal. Confirm water discharges under the caravan. Leave relevant drain valves open.
- Open every tap midway between hot and cold. Drain and open the shower head/hose; empty waste traps where accessible.
- Empty, clean and dry the toilet cassette and flush system. Empty the fridge; clean and prop both doors open.
- Remove food/liquids and vulnerable bedding. Open clean cupboards/locker doors for ventilation without blocking fixed vents.
- Gas cylinder off. 12V MASTER and PUMP off. Mover disengaged and isolated.
- Follow the selected leisure-battery strategy: supported smart maintenance charging, or isolate/remove and recharge safely at intervals. Never leave it deeply discharged.
- Inflate tyres correctly, prevent long-term point loading where practical, chock securely and avoid leaving the handbrake applied for prolonged storage when site conditions allow.
11Spring recommissioningReverse the winter process safely
- Inspect for damp, pests, damaged seals, blocked vents, leaks, corrosion and tyre deterioration before energising anything.
- Check/reinstall the correctly charged battery with correct polarity; inspect fuses and 230V lead. Connect hook-up and test the RCD.
- Close FrostControl and every confirmed drain. Reconnect water, flush thoroughly and sanitise with a potable-water product at its stated dose/contact time.
- Prime cold then hot taps, confirm the boiler fills, and inspect every connection for leaks before selecting water heating.
- Check gas hose/regulator condition, open gas slowly, leak-test only with approved fluid, then test appliances individually.
- Recommission toilet and fridge; test heating on each intended energy source.
- Check tyre pressure/age/condition, wheel-bolt schedule, mover, hitch, brakes, breakaway cable, lights, alarms and extinguishers.
- Finish with a full roadworthiness and departure check.
No exact match.
Try a shorter term such as “water”, “12V”, “Truma” or “mover”.
First-owner orientation
Know the four controls above the lounge
The numbered photograph keys the controls without guessing at hidden circuits.

- 1Main lights rocker
Controls the main interior lighting group.
- 2Truma CP Plus
Room heat, water temperature, energy source and fan.
- 312V MASTER
Switches the habitation 12V system. It is not full battery isolation.
- 4Water PUMP
Supplies the taps and boiler. Turn it off before travel, draining or when a leak is suspected.
Do not confuse the switches. The PowrTouch mover has a separate high-current isolator. Its exact location still needs a confirming photograph.
Hager consumer unit
RCD and MCB protection. Test the RCD after connecting on site.
ConfirmedFuse board & charger
Under the front sofa. Replace a fuse only like-for-like after finding the cause.
ConfirmedUltraflow inlet
External submersible pump supply, feeding taps and the Truma water container.
ConfirmedFront gas locker
6 kg Calor propane, secured upright, with GOK 30 mbar regulator.
ConfirmedThetford C262CWE
Cassette accessed from its external service door.
ConfirmedThetford N4142E+
Three-way absorption fridge: 230V, gas and towing 12V modes.
ConfirmedInstalled heating
Truma Combi 4E controls
The rotary control is also a push button. Rotate to move between icons; press to select or confirm. The back key returns one level.
- Thermometer / caravan
- Room temperature
- Thermometer / water
- Water temperature
- Flame / lightning
- Gas, EL1/EL2 or MIX1/MIX2
- Fan
- Air circulation level
Record any fault code before acknowledging it. A code is diagnostic evidence, not clutter to clear.

Fast fault finder
Start with the symptom
Check only what is safe and visible. A repeated protective-device trip is a fault, not an inconvenience.
No 230V sockets
- Pitch supply switched on?
- CEE plugs fully seated?
- RCD and MCBs on?
- Site breaker reset?
- Still dead: test the supply/lead professionally.
No 12V
- MASTER on?
- Battery connected and above a safe voltage?
- Main fuse intact?
- Charger working on hook-up?
- One circuit only: inspect its labelled fuse.
Pump runs continuously
- Turn PUMP off.
- Check container level and pump submerged.
- Close all taps and inspect for leaks.
- Check drain valve is closed for use.
- Air leak or pressure switch needs service if unresolved.
No water
- Water in container?
- Pump connected and submerged?
- MASTER and PUMP on?
- FrostControl/drains closed?
- Open a cold tap to prime; inspect hose/fuse.
Truma will not ignite
- Record the code.
- Gas bottle open and not empty?
- 12V supply healthy?
- Correct energy source selected?
- Flue clear? After two careful attempts, stop and diagnose.
Heating blows cool
- Setpoint above room temperature?
- Give the heat exchanger time to warm.
- Correct source and fan mode?
- Outlets open and unobstructed?
- Code present: record and use Truma instructions.
Fridge not cooling
- Caravan reasonably level?
- Correct source selected and available?
- External vents clear?
- Allow several hours from warm.
- Stop if gas flame is unstable, smell/soot appears, or electrical protection trips.
Mover will not operate
- Battery sufficiently charged?
- Dedicated mover isolator on?
- Handset paired/awake?
- Rollers engaged correctly?
- Controller showing a fault? Do not bridge safety circuits.
Act first, diagnose later
Emergency quick reference
Smell of gas / CO alarm
- No flames, sparks or electrical switches.
- If safe, close the cylinder valve.
- Open doors/windows manually; evacuate.
- Call emergency services if symptoms, fire or danger.
- Do not reuse until professionally checked.
Electrical fault
- Do not touch wet/damaged equipment.
- Switch pitch supply off if safe.
- Disconnect bollard-first.
- For 12V heat/smoke, isolate battery only if safe.
- Fire or shock injury: call emergency services.
Water leak
- PUMP off immediately.
- Disconnect external water.
- Water heating off.
- Protect electrics; contain and dry.
- Find the source before repressurising.
Fire
- Get everyone out; stay out.
- Call emergency services.
- Close gas only if reachable without risk.
- Use an extinguisher only on a tiny escape-route fire.
- Warn neighbouring pitches.
Tyre / towing concern
- Reduce speed smoothly; no harsh inputs.
- Stop in the safest available place.
- Use hazards and keep people away from traffic.
- Do not crawl under an unsupported caravan.
- Call breakdown help if stability or wheel security is uncertain.
Hitch concern
- Do not continue “to see if it settles”.
- Stop safely and secure car/caravan.
- Check coupling indicator, handle, cable, plug and jockey wheel.
- Repeat the lift test if uncoupled/reconnected.
- Seek assistance if any component is damaged or uncertain.
The formal guide
What the 53-page master covers
The personalised master remains Keith’s private owner record. This public page carries the procedures without publishing its VIN or ownership details.
- 01Identity, weights and payload
- 02First-time owner orientation
- 03Before every journey
- 04Hitching and unhitching
- 05PowrTouch motor mover
- 06Electrical system
- 07Gas system
- 08Water system
- 09Truma heating and hot water
- 10Thetford cassette toilet
- 11Thetford refrigerator
- 12Arrival and setting up
- 13Packing up and departure
- 14Living safely and efficiently
- 15Winterisation — September 2026
- 16Spring recommissioning
- 17Maintenance and records
- 18Troubleshooting by symptom
- 19Emergency quick reference
- 20Keith’s notes and source record
Close the remaining gaps
Photographs and checks still needed
These items stay marked “to confirm” until a label, photograph or direct physical check proves them.
Technical basis
Primary documentation first
Equipment identifications come from Keith’s photographs and data plates. Operating and safety guidance is traced to Adria, Truma, Thetford, PowrTouch, AL-KO, GOV.UK, TyreSafe and recognised UK caravan-industry guidance. If installed equipment differs, its current data plate and manual take priority.